
Creating Caricatures: Step-by-Step Part 4
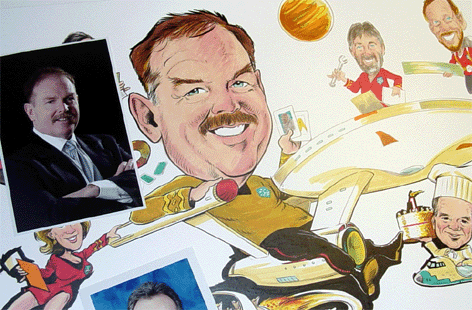
Here's how I created a large group caricature for the University of Technology, Sydney. You can see the end result here.
STEP 1: Roughing out the concept
This "group caricature" is to feature the Vice-Chancellor prominently, celebrating his first twelve months in the position, with the other department heads surrounding him. The original idea is to have them all working as a team on the rocketship UTS. During discussions, the spaceship idea turns to one featuring the UTS Enterprise. Once the theme has been established, everything else falls into place.
Using a full sheet of 4G card (710mm x 530mm), I measure out a border and mark it using removable sticky-tape - this way (since the background is going to be largely inked-in, simulating space) I don't have to worry aboput breaking the border with my brush. I then gather together my raw materials - photos supplied by the Uni, with a couple of Star Trek and Doctor Who books for reference... it helps to have a good, wide-ranging reference library!

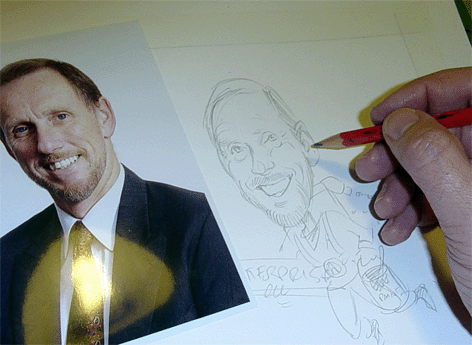
Here, you can see all the elements taking shape. Our main subject is represented with a bigger head to indicate his prominence (dressed in the Captain Kirk role) and each of the others have their various characters defined by the character notes I requested from the Uni. For example, the chap on the bottom right has a passion for the history of food - so he is piloting the catering shuttle, wearing a chef's hat.
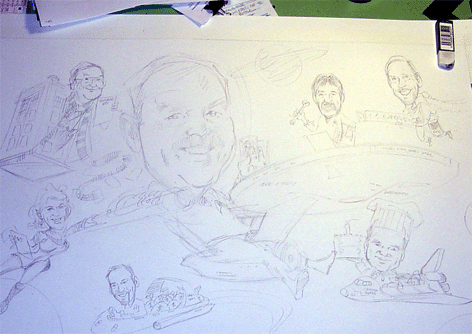
STEP 2: Refining the rough
I photocopy the rough and fax it to my client for approval. The response is ecstatic. Taking that as the OK (humour here, folks), I get down to the serious stuff, using a sepia gouache to define the linework with more detail.
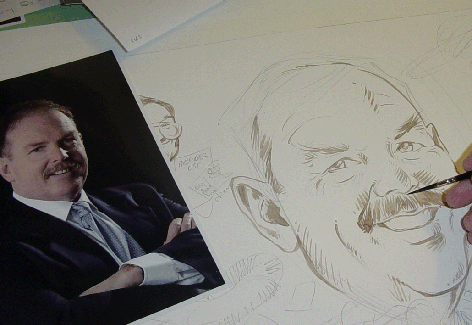
The reason I use the gouache instead of inking in straight away is mainly because I will be using Pantone colour pens to add the bulk of the colour. If I applied the pens over the pencil, the colour pens will smudge into the pencil, likewise if I were to colour over inked linework. The beauty of gouache is that once applied, I can rub out the confusing rough pencil lines - as I rub out the pencil the gouache is "cut back" to a much fainter line which is less likely to mix with the colour pens.
It's at this stage I decided to replace the "Starfleet" logo with the logo of the university, which obviously made more sense. Later on, at the presentation, someone noted the university's logo on the tunics and referred to that as "a nice touch" on my part!

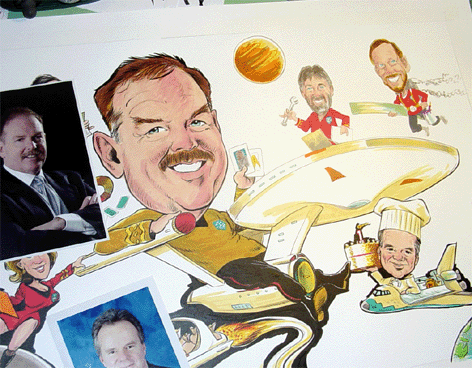
After erasing the pencil, I add blocks of Pantone colour over the gouache linework. At this stage, it looks very unfinished, but is quite amazing what will happen when I add the black ink! I have just started to do so in this photo (see the underside of the starship).
STEP 3: Inking it in
This is the time-consuming bit. We've already done the linework as such, really, when we applied the gouache, but now it needs to be defined. Using a 00 sable brush and some FW Drawing Ink, I get to work. I don't need to be so careful with the linework or colour around the face, because that area will be blacked-in with "space".
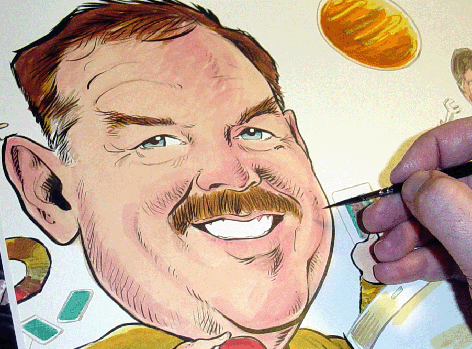
It's never to late to add little touches! As I was inking, I realised that I hadn't really decided what to write on the various clipboards and signage. Those areas had been left as blank blocks of colour. Using a nib pen, I filled in details on the postcard, clipboards and the sign on the Police Box door. Since the "Doctor" was a postcard collector, a reference to that was added. I blacked in the "space" areas using a thicker brush as there wasn't any need left for careful linework.

STEP 4: The finishing touches

Removing the tape reveals a remarkably straight line! As a finishing touch, I use a correction fluid pen to add spots of light to noses and eyes and to create the star field... very important. After that, it's a trip to the framer's shop where it ends up looking REALLY impressive!

Click here to see the finished art

Press the button to return to Steve's Home Page
All artwork ©2007 Noz Productions